In this post, we will describe how to configure VPN site-to-site in netscreen devices.
The screen OS used is 6.3.X
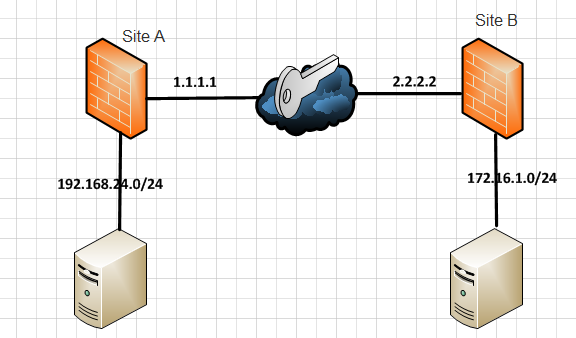
The connection it will be secured throw VPN tunnel between servers 192.168.24.0/24 and 172.16.1.0/24
Configure VPN Using web interface
On site A, Click VPNs -> Autokey Advanced -> Gateway and Click New
Gateway Name: SiteB-GW
Remote Gateway and Select Static IP Address (2.2.2.2),
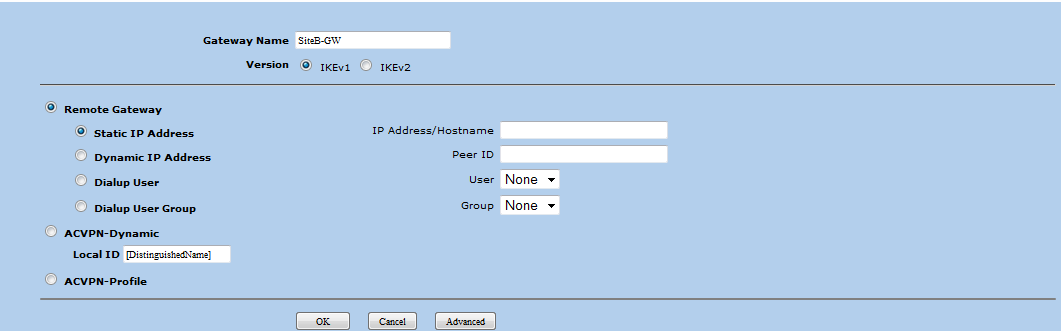 Phase1 Creation
then click Advanced:
Preshared Key netscreen, Select the outgoing interface (Ethernet 0/0) and security level (pre-g2-3des-sha). Click Return and OK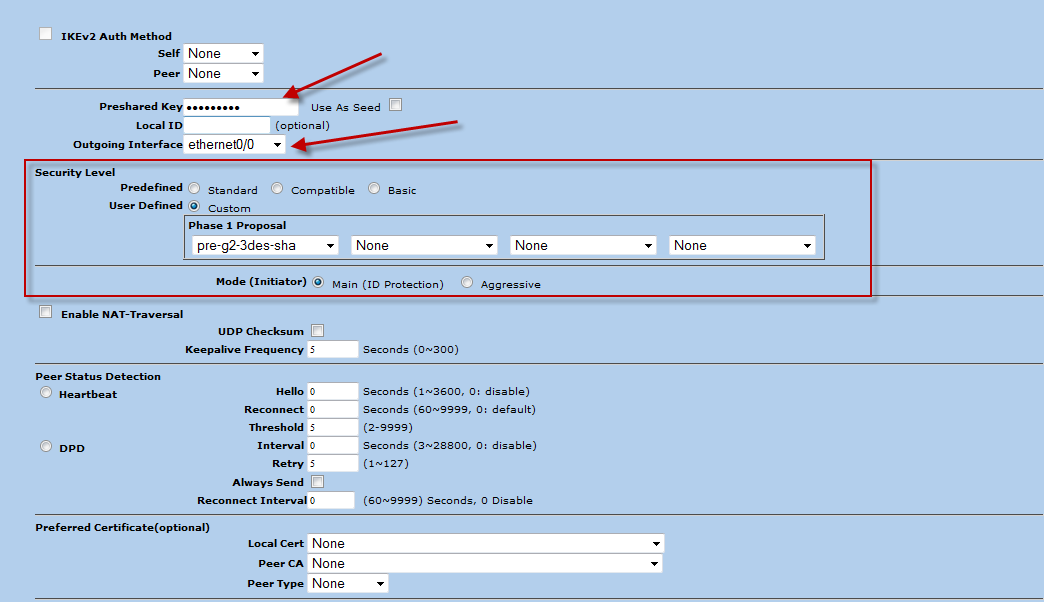 Phase 1 Advanced parameters
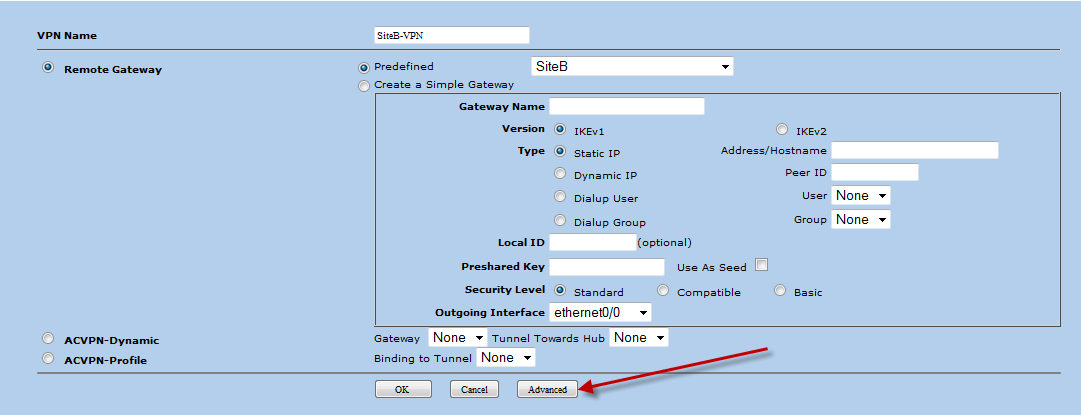
After Creating Phase 1, We need to create Phase 2 VPN
Click VPNs -> AutokeyIKE -> New
VPN Name: SiteB-VPN
Remote Gateway: use the phase 1 SiteB and click Advanced
 Phase 2 Creation
Security Level, User Defined: Select Custom, and Select Phase 2 Proposal: g2-esp-3des-sha
Then click Return and OK
Phase 2 Advanced Parameters
After configuring the Phase 2, we need to configure the proxy ID (Define the local and Remote network)
Click VPN -> Autokey IKE -> SiteB-VPN -> ProxyID
Proxy ID creation
Local IP: The local network 192.168.24.0/24
Remote IP: The remote network 172.16.1.0/24
Service ANY
Then Click New
Proxy ID Creation
After configure the VPN, we need to create a policy to permit traffic between the two sites.
Click policy -> Policies
Select from trust to Untrust, and Click New
Source Address: Click New Address, and enter 192.168.24.0/24
Destination Address: Click New Address, and enter 172.16.1.0/24
Service: Any
Action: Tunnel
Tunnel : SiteB-VPN
Position at Top: Enabled
And click OK
Configure VPN using CLI


Recent Comments